![[Visual Studio] Setup 프로젝트 만들기](https://3001ssw.com/wp-content/uploads/2026/01/blog_main_banner4.png)
이번 글에서는 Visual Studio에서 Setup Project를 이용하여 설치 파일을 만들어보겠습니다.
아래 순서대로 작업하시면 기본적인 설치 파일이 만들어집니다.
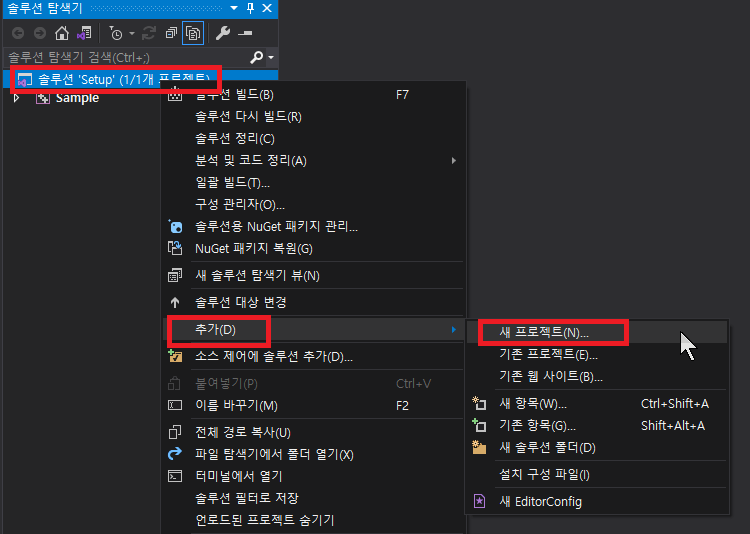
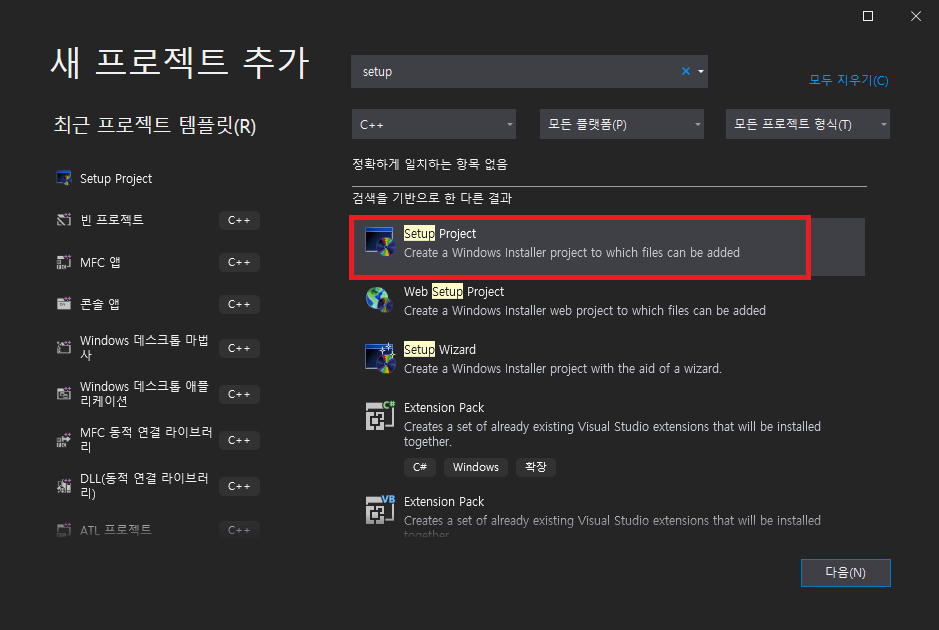
‘솔루션 우클릭’->’추가’->’새 프로젝트’를 선택하여 ‘Setup Project’ 선택합니다.
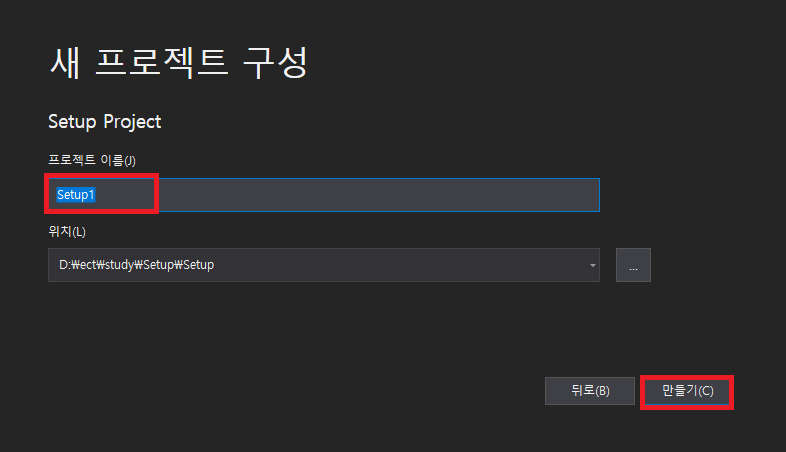
‘프로젝트 이름 입력’ 후 ‘만들기’ 버튼 클릭합니다.
정상적으로 생성 되었으면 아래와 같이 Setup Project가 생성되고, File System 뷰를 볼 수 있습니다.
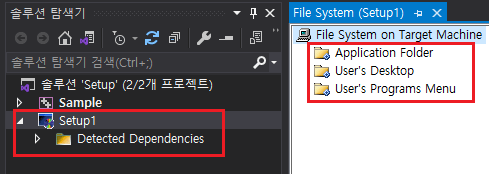
File System에 있는 3개의 폴더의 의미는 다음과 같습니다.
| Application Folder | 설치 경로의 폴더 |
| User’s Desktop | 바탕화면 |
| User’s Programs Menu | 시작메뉴 |
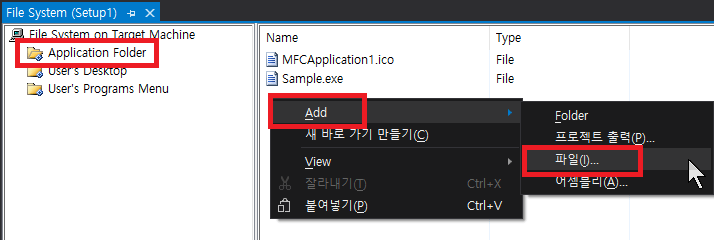
우선 Application Folder를 ‘마우스 우클릭’->’Add’->’파일’을 선택해서 설치할 파일과 아이콘으로 사용될 .ico 파일을 추가합니다.
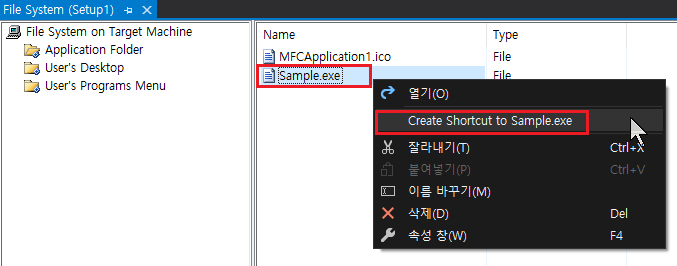
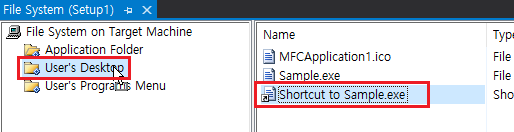
바탕화면과 시작메뉴에 바로가기를 추가하려면 아래와 같이 ‘마우스 우클릭’->’Create Shortcut To ~~.exe’를 선택한 뒤 드래그 하여 User’s Desktop과 User’s Programs Menu로 이동시켜 줍니다. (두번 작업해야 합니다.)
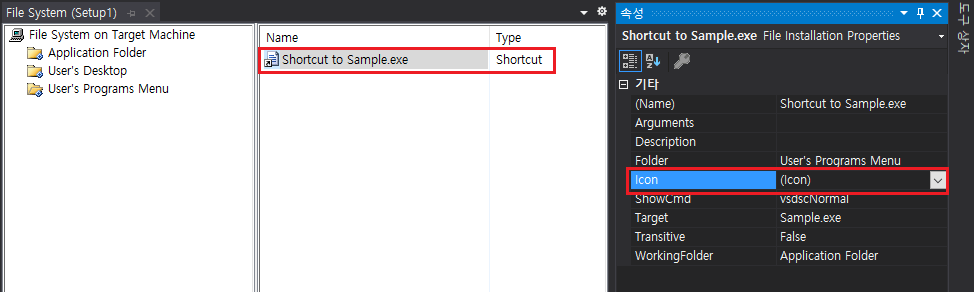
이 바로가기에 아이콘을 추가하려면 ‘속성’->’Icon’->’Browse’를 선택합니다.
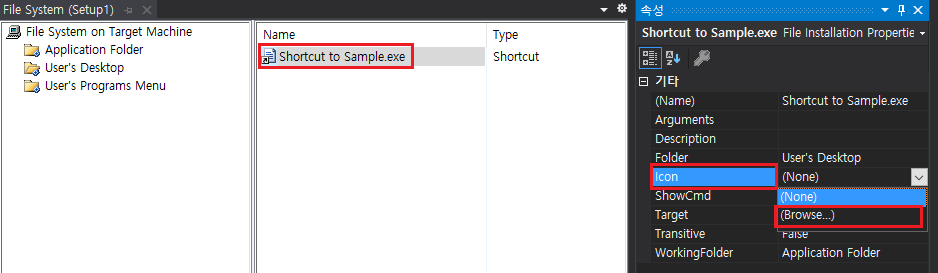
그러면 아래와 같이 대화상자가 나오는데 ‘Browse’ 버튼을 클릭합니다.
아까 추가했던 ‘Application Folder’ 위치에서 .ico 파일을 선택합니다.


정상적으로 아이콘이 설정되었으면, 속성에 (Icon)이라고 표시됩니다.
위 작업을 User’s Desktop과 User’s Programs Menu, 두번 작업합니다.
Setup 프로젝트를 좌클릭 하면 속성창에 다음과 같이 표시됩니다.
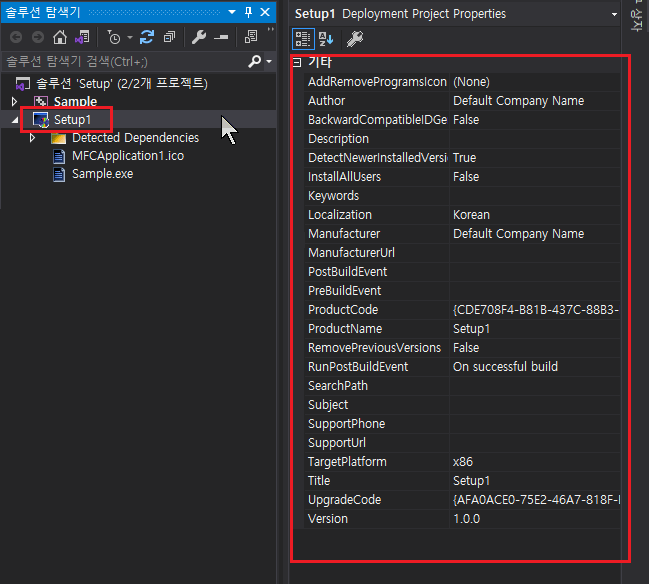
자주 사용되는 속성들에 대한 설명은 아래와 같습니다.
| AddRemoveProgramIcon | 삭제 프로그램 아이콘 |
| Author | 프로그램 권한 |
| InstallAllUsers | 모든 사용자 설치(설치 시) |
| Localization | 지역 |
| Manufacturer | 제조사 |
| ManufacturerUrl | 제조사 URL |
| ProductName | 프로그램 이름 |
| RemovePresiouseVersion | 이전 버전 삭제 |
| SupportPhone | 고객지원 번호 |
| SupportUrl | 고객지원 URL |
| Version | 버전 |
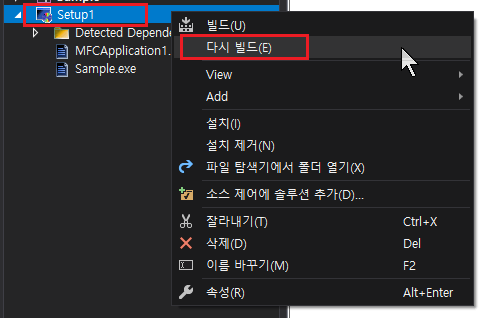
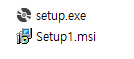
Setup 프로젝트를 ‘우클릭’->’다시 빌드’를 선택하면, ‘Setup 프로젝트’->’Debug/Release’에 설치 파일이 생겨납니다.
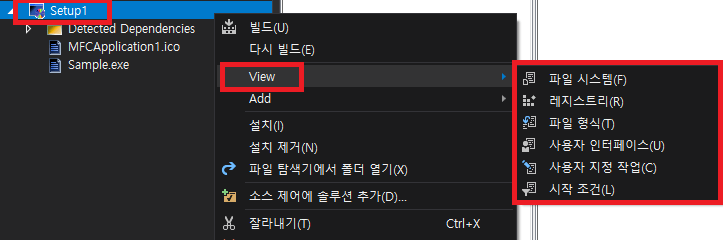
마지막으로 ‘프로젝트 우클릭’->’View’를 보면 설치파일에 대한 여러 가지 옵션을 제공합니다.
추후에 다룰 일 있을 때 다시 글을 쓰겠습니다.