![[WPF] XAML의 이해](https://3001ssw.com/wp-content/uploads/2026/01/blog_main_banner4.png)
이번 글에서는 XAML에 대해 가볍게 알아보겠습니다.
XAML 네임스페이스
기본적으로 프로젝트를 생성하게 되면 아래와 같이 xmlns라고 써져있는 것을 볼 수 있습니다.
<Window x:Class="_02_Understanding_XAML.MainWindow"
        xmlns="http://schemas.microsoft.com/winfx/2006/xaml/presentation"
        xmlns:x="http://schemas.microsoft.com/winfx/2006/xaml"
        xmlns:d="http://schemas.microsoft.com/expression/blend/2008"
        xmlns:mc="http://schemas.openxmlformats.org/markup-compatibility/2006"
        xmlns:local="clr-namespace:_02_Understanding_XAML"
        mc:Ignorable="d"
        Title="MainWindow" Height="450" Width="800">
    <Grid>
    </Grid>

</Window>
xmlns 특성은 C#에서 using 키워드 같이 XAML에서 네임스페이스의 사용을 선언합니다. 값은 URL이며 xmlns 특성이 추가되면 이 요소와 해당 하위 요소에 기본적으로 해당 URL이 접두어로 추가된다는 것을 의미합니다.
위에서 Grid 요소는 실제로 http://schemas.microsoft.com/winfx/2006/xaml/presentation:Grid와 같습니다.
객체 생성
네임스페이스 사용 뿐만 아니라 XAML에서 객체 생성도 가능합니다. C#에서는 아래와 같이 new를 사용하여 객체를 선언합니다.
namespace Vehicle
{
    public class Car
    {
    }
}

using Vehicle;
Car MyCar = new Car();
XAML에서는 아래와 같이 객체를 생성할 수 있습니다.
<Window x:Class="_02_Understanding_XAML.MainWindow"
        xmlns="http://schemas.microsoft.com/winfx/2006/xaml/presentation"
        xmlns:x="http://schemas.microsoft.com/winfx/2006/xaml"
        xmlns:d="http://schemas.microsoft.com/expression/blend/2008"
        xmlns:mc="http://schemas.openxmlformats.org/markup-compatibility/2006"
        xmlns:local="clr-namespace:_02_Understanding_XAML"
        xmlns:vehicle="clr-namespace:Vehicle"
        mc:Ignorable="d"
        Title="MainWindow" Height="450" Width="800">
    <vehicle:Car x:Name="MyCar"/>
</Window>
속성 정의
XAML에서 객체를 생성했다면 객체의 속성 또한 쉽게 값을 할당 할 수 있습니다. C#에서 아래와 같이 Car 클래스에 CarName과 Speed 속성이 선언되어 있다면
namespace Vehicle
{
    public class Car
    {
        public string CarName { get; set; }
        public double Speed { get; set; }
    }
}

using Vehicle;
Car MyCar = new Car();
MyCar.CarName = "Hyudai";
MyCar.Speed = 10.12;
XAML에서 아래와 같이 객체 속성을 할당 할 수 있습니다.
<Window x:Class="_02_Understanding_XAML.MainWindow"
        xmlns="http://schemas.microsoft.com/winfx/2006/xaml/presentation"
        xmlns:x="http://schemas.microsoft.com/winfx/2006/xaml"
        xmlns:d="http://schemas.microsoft.com/expression/blend/2008"
        xmlns:mc="http://schemas.openxmlformats.org/markup-compatibility/2006"
        xmlns:local="clr-namespace:_02_Understanding_XAML"
        xmlns:vehicle="clr-namespace:Vehicle"
        mc:Ignorable="d"
        Title="MainWindow" Height="450" Width="800">
    <vehicle:Car x:Name="MyCar" CarName="Hyudai" Speed="10.12"/>
</Window>
명명 규칙
XAML에서 선언한 객체를 C#코드에서 조작하거나 하려면 x:Name 특성을 추가하면 가능합니다. 이때까지 위 코드를 보면 XAML에 x:Name=”MyCar”라고 되어 있는데, .cs 코드에서 바로 MyCar를 사용 가능합니다.
<Window x:Class="_02_Understanding_XAML.MainWindow"
        xmlns="http://schemas.microsoft.com/winfx/2006/xaml/presentation"
        xmlns:x="http://schemas.microsoft.com/winfx/2006/xaml"
        xmlns:d="http://schemas.microsoft.com/expression/blend/2008"
        xmlns:mc="http://schemas.openxmlformats.org/markup-compatibility/2006"
        xmlns:local="clr-namespace:_02_Understanding_XAML"
        xmlns:vehicle="clr-namespace:Vehicle"
        mc:Ignorable="d"
        Title="MainWindow" Height="450" Width="800">
    <vehicle:Car x:Name="MyCar" CarName="Hyudai" Speed="10.12"/>
</Window>
namespace _02_Understanding_XAML
{
/// <summary>
/// MainWindow.xaml에 대한 상호 작용 논리
/// </summary>
public partial class MainWindow : Window
{
public MainWindow()
{
InitializeComponent();
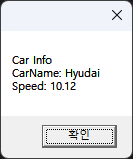
MessageBox.Show($"Car Info" + Environment.NewLine +
$"CarName: {MyCar.CarName}" + Environment.NewLine +
$"Speed: {MyCar.Speed}" + Environment.NewLine );
}
}
}
github: https://github.com/3001ssw/c_sharp/tree/main/WPF/WPF_MVVM_1Week/02_Understanding_XAML