![[WPF] TreeView](https://3001ssw.com/wp-content/uploads/2026/01/blog_main_banner4.png)
WPF에서 TreeView를 사용하는 방법에 대해 알아보겠습니다. 생각보다 많은 것을 지원해주지 않아서 빠르게 알아보겠습니다. 만들어 볼 예제는 Folder, File 구조이고, MainWindow.xaml에 아래와 같이 입력하겠습니다.
<Window x:Class="WpfTreeView.MainWindow"
        xmlns="http://schemas.microsoft.com/winfx/2006/xaml/presentation"
        xmlns:x="http://schemas.microsoft.com/winfx/2006/xaml"
        xmlns:d="http://schemas.microsoft.com/expression/blend/2008"
        xmlns:mc="http://schemas.openxmlformats.org/markup-compatibility/2006"
        xmlns:local="clr-namespace:WpfTreeView"
        mc:Ignorable="d"
        Title="MainWindow"
        Height="450"
        Width="800">
    <Window.DataContext>
        <local:MainWindowViewModel/>
    </Window.DataContext>

    <TreeView ItemsSource="{Binding Items}"/>

</Window>
그 다음 MainWindowViewModel.cs를 만들어 아래와 같이 입력하겠습니다.
public class MainWindowViewModel : Notifier
{
    public ObservableCollection<BaseViewModel> Items { get; set; } = new ObservableCollection<BaseViewModel>();
    public MainWindowViewModel()
    {
        FolderViewModel root = new FolderViewModel()
        {
            Name = "root",
            Children =
            {
                new FolderViewModel() { Name = "A", },
                new FolderViewModel()
                {
                    Name = "B",
                    Children =
                    {
                        new FileViewModel()
                        {
                            Name = "f2",
                            FileSize = 200,
                        }
                    },
                },
                new FolderViewModel() { Name = "C", },
                new FileViewModel()
                {
                    Name = "f1",
                    FileSize = 100,
                }
            },
        };

        Items.Add(root);

    }
}
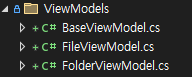
아이템에 입력될 ViewModel들을 만들어보겠습니다. 아래와 같이 ViewModels 폴더에 BaseViewModel.cs, FileViewModel.cs, FolderViewModel.cs를 만들어 줍니다.
public class BaseViewModel
{
    public string Name { get; set; } = "";

    public ObservableCollection<BaseViewModel> Children { get; set; } = new ObservableCollection<BaseViewModel>();

    public BaseViewModel()
    {
    }
}
public class FileViewModel : BaseViewModel
{
    public int FileSize { get; set; } = 0;


    public FileViewModel()
    {

    }
}
public class FolderViewModel : BaseViewModel
{
    public FolderViewModel()
    {

    }
}
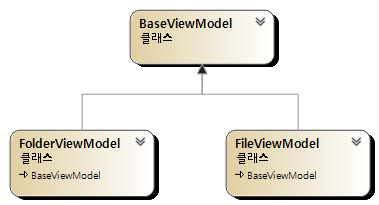
구조는 아래와 같이 BaseViewModel이 상위 클래스 이며, 파생되어 FolderViewModel, FileViewModel을 만들었습니다.
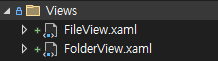
그 다음 아래와 같이 Views 폴더에 FileView.xaml과 FolderView.xaml을 만들어줍니다.
<UserControl x:Class="WpfTreeView.Views.FileView"
             xmlns="http://schemas.microsoft.com/winfx/2006/xaml/presentation"
             xmlns:x="http://schemas.microsoft.com/winfx/2006/xaml"
             xmlns:mc="http://schemas.openxmlformats.org/markup-compatibility/2006"
             xmlns:d="http://schemas.microsoft.com/expression/blend/2008"
             xmlns:local="clr-namespace:WpfTreeView"
             mc:Ignorable="d"
             Height="Auto"
             Width="Auto">
    <StackPanel Grid.Column="1"
                Orientation="Horizontal">
        <TextBlock Text="📄"/>
        <TextBlock Text="{Binding Name}"
                   Margin="4,0,0,0"/>
        <TextBlock Text="{Binding FileSize}"
                   Margin="4,0,0,0"/>
    </StackPanel>
</UserControl>
<UserControl x:Class="WpfTreeView.Views.FolderView"
             xmlns="http://schemas.microsoft.com/winfx/2006/xaml/presentation"
             xmlns:x="http://schemas.microsoft.com/winfx/2006/xaml"
             xmlns:mc="http://schemas.openxmlformats.org/markup-compatibility/2006"
             xmlns:d="http://schemas.microsoft.com/expression/blend/2008"
             xmlns:local="clr-namespace:WpfTreeView.Views"
             mc:Ignorable="d">
    <StackPanel Grid.Column="1"
                Orientation="Horizontal">
        <TextBlock Text="📁"/>
        <TextBlock Text="{Binding Name}"
                   Margin="4,0,0,0"/>
    </StackPanel>
</UserControl>
마지막으로 App.xaml에 아래와 같이 입력해줍니다.
<Application x:Class="WpfTreeView.App"
             xmlns="http://schemas.microsoft.com/winfx/2006/xaml/presentation"
             xmlns:x="http://schemas.microsoft.com/winfx/2006/xaml"
             xmlns:local="clr-namespace:WpfTreeView"
             xmlns:vm="clr-namespace:WpfTreeView.ViewModels"
             xmlns:v="clr-namespace:WpfTreeView.Views"
             StartupUri="MainWindow.xaml">
    <Application.Resources>
        <HierarchicalDataTemplate DataType="{x:Type vm:FileViewModel}"
                                  ItemsSource="{Binding Children}">
            <v:FileView/>
        </HierarchicalDataTemplate>
        <HierarchicalDataTemplate DataType="{x:Type vm:FolderViewModel}"
                                  ItemsSource="{Binding Children}">
            <v:FolderView/>
        </HierarchicalDataTemplate>
    </Application.Resources>
</Application>
실행하면 아래와 같이 표시됩니다.
TreeView는 선택한 아이템 목록도 얻으려면 직접 Behavior을 만들어줘야하고 연결선도 직접 만들어야합니다. 나중에 기회되면 만들어보겠습니다
github : https://github.com/3001ssw/c_sharp/tree/main/WPF/WPF_Basic/WpfTreeView